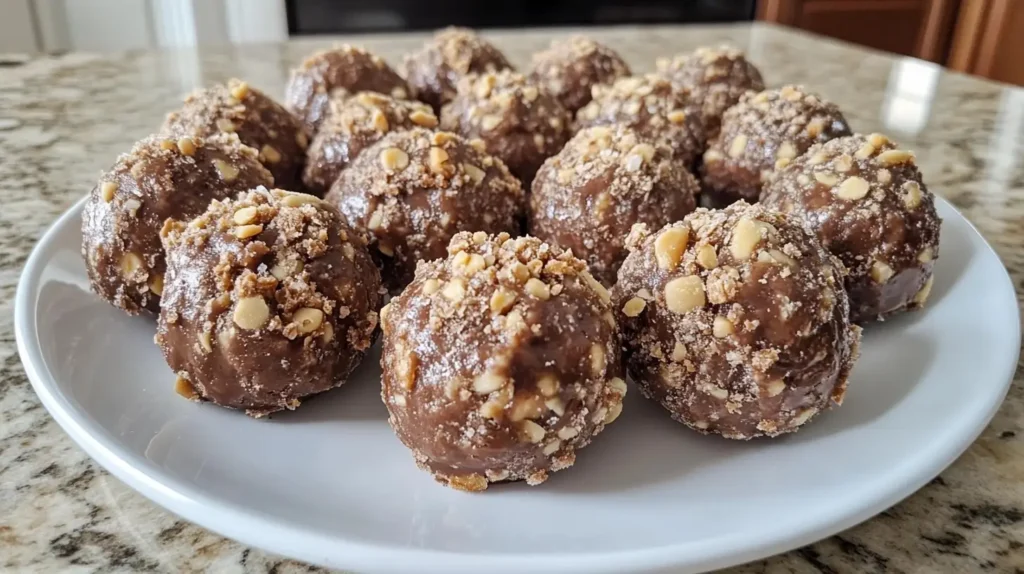
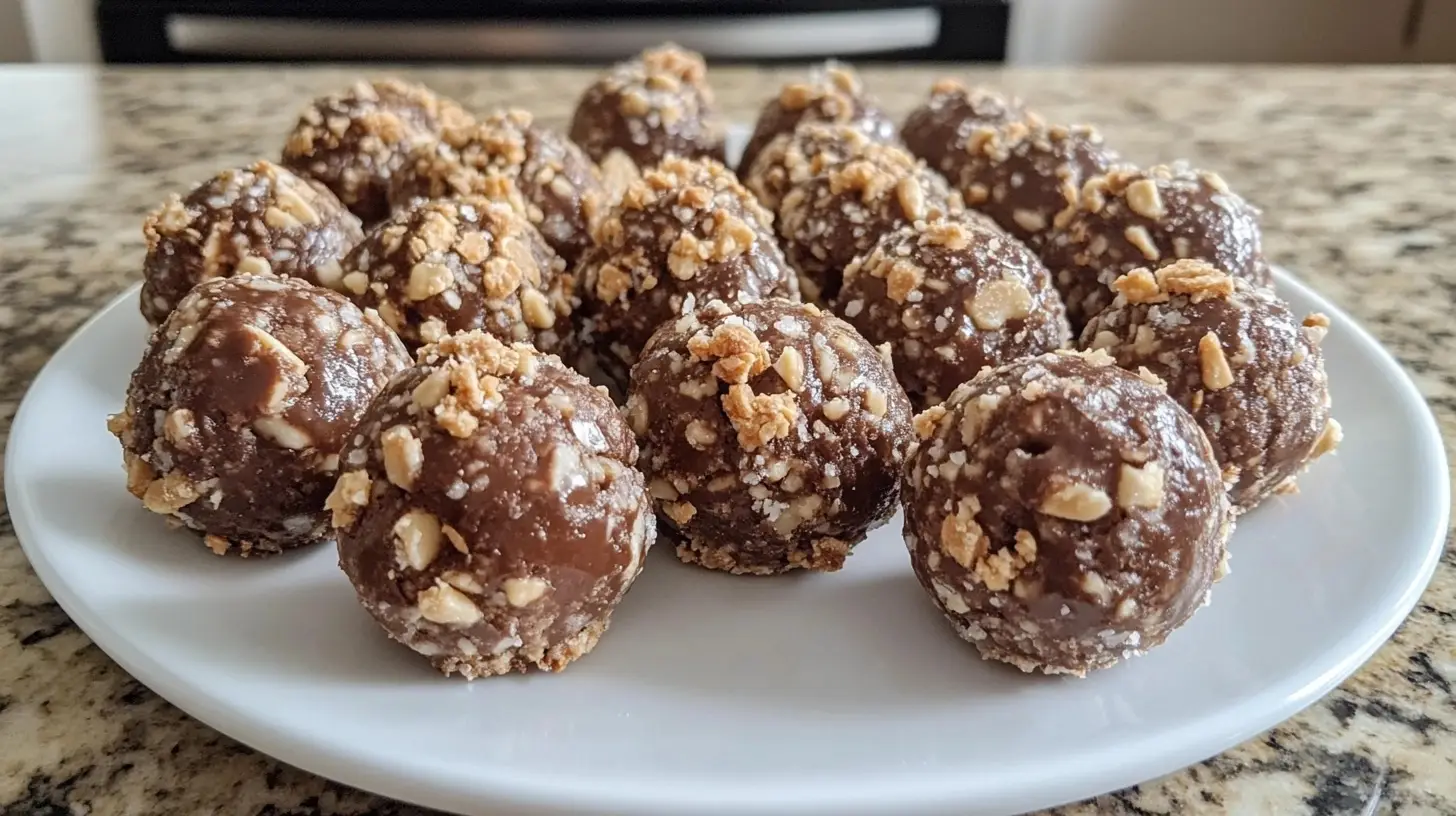
These irresistible no-bake Butterfinger Balls capture everything you love about the iconic candy bar in one bite-sized treat! With that perfect combination of creamy peanut butter and signature candy crunch coated in smooth chocolate, they’re dangerously easy to make. Perfect for holiday gatherings or homemade gifts, these crowd-pleasing desserts require just a handful of simple ingredients and zero baking skills. Make a batch ahead of time and watch how quickly they disappear from your dessert tray!
Table of Contents
Why You’ll Love This Recipe
These Butterfinger Balls deliver that iconic candy crunch in bite-sized form with minimal effort! No baking required, just mix, roll, dip, and enjoy. They’re perfect for holiday gatherings, homemade gifts, or satisfying sweet cravings any day of the week. Kids love helping make them, and you’ll love that they can be prepared ahead and stored for whenever dessert emergencies strike. With that irresistible combination of peanut butter creaminess and Butterfinger crispiness all wrapped in chocolate, these treats disappear fast at every gathering!
Ingredients for Butterfinger Balls
Let’s gather everything you’ll need to create these irresistible treats! The beauty of this recipe is that it requires just a handful of simple ingredients that combine to recreate that famous Butterfinger flavor and texture.
For the Butterfinger Mixture:
- 8 regular-sized Butterfinger candy bars (or about 20 fun-size bars)
- 1 cup creamy peanut butter
- ¼ cup butter, softened
- 2 cups powdered sugar
- 1 cup graham cracker crumbs (about 8 full sheets, crushed)
- 1 teaspoon vanilla extract
For the Chocolate Coating:
- 2 cups chocolate melting wafers (milk or semi-sweet)
- 1 tablespoon shortening or coconut oil (optional, helps thin the chocolate)
Helpful Equipment:
- Food processor or heavy-duty ziplock bag for crushing
- Mixing bowls
- Cookie scoop or tablespoon
- Parchment paper
- Baking sheets
Pro Tip: For the best texture, make sure your Butterfinger bars are very finely crushed. Those tiny pieces distribute that signature candy crunch throughout each bite!
Ingredient Notes:
- Room temperature butter and peanut butter will mix more easily and create a smoother filling.
- Quality matters with the chocolate coating, choose melting wafers designed for dipping for the smoothest results.
- Graham cracker crumbs help achieve that perfect texture that isn’t too sticky or too dry.
Ready to transform these simple ingredients into something amazing? Let’s move on to how to put it all together!
How To Make Butterfinger Balls
Creating these delicious treats is wonderfully straightforward! Follow these simple steps for perfect recipe for Butterfinger Balls every time.
Step 1: Prepare the Butterfinger mixture
- Crush the Butterfinger bars until finely ground. You can use a food processor (pulse in 5-second bursts) or place the candy in a ziplock bag and crush with a rolling pin. The finer the crush, the better your texture will be!
- Mix the base ingredients in a large bowl. Combine the softened butter and peanut butter until smoth.
- Add the dry ingredients – powdered sugar and graham cracker crumbs – and mix until incorporated.
- Fold in the crushed Butterfingers and vanilla extract until evenly distributed throughout the mixture.
Step 2: Form the balls
- Chill the mixture for 30 minutes in the refrigerator. This makes it easier to handle and shape.
- Scoop tablespoon-sized portions using a cookie scoop or measuring spoon.
- Roll between your palms to form smooth balls. If the mixture becomes sticky, chill it again for 15 minutes or lightly dust your hands with powdered sugar.
- Arrange the balls on a parchment-lined baking sheet.
- Chill again for 20 minutes before dipping. This crucial step helps the balls hold their shape when meeting warm chocolate!
Step 3: Dip in chocolate
- Melt the chocolate wafers according to package directions. If using, add shortening or coconut oil to thin the chocolate for easier coating.
- Dip each ball using a fork or dipping tool, gently tapping to remove excess chocolate.
- Place dipped balls back on the parchment paper.
- Add decorative touches if desired – a small piece of Butterfinger on top or a drizzle of contrasting chocolate makes these extra special!
Step 4: Set and enjoy
- Allow chocolate to fully set (about 1 hour at room temperature or 30 minutes in the refrigerator).
- Transfer to serving dish or storage container.
Troubleshooting Tips:
- If your mixture seems too dry, add a touch more peanut butter.
- If it’s to sticky, add a bit more powdered sugar.
- Working in batches? Keep undipped balls in the refrigerator while you work.

These Butterfinger Balls may look impressive, but they’re truly one of the easiest homemade candy recipes you’ll ever make. The hardest part is resisting them until they’re completely set!
Substitutions & Variations
These Butterfinger Balls recipe are incredibly versatile and easy to customize! Here are some quick ways to make the recipe your own:
Quick Substitutions:
- Crunchy peanutt butter instead of creamy for extra texture
- Dark or white chocolate coating instead of milk chocolate
- Vanilla wafers or gluten-free graham crackers instead of regular graham crackers
Try These Variations:
- Mini Butterfinger Truffles: Make bite-sized and roll in cocoa powder
- Butterfinger Bars: Press into a pan and cut into squares
- Holiday Decorations: Add festive sprinkles or drizzle with contrasting chocolate
Dietary Adaptations:
- Dairy-Free: Use plant-based butter and dairy-free chocolate
- Less Sweet: Reduce powdered sugar and use darker chocolate
Whatever customization you choose, you’ll still get that irresistible combination of chocolate and signature Butterfinger crunch that makes these treats so special!
Storage Tips & Make-Ahead Instructions
These Butterfinger Balls store beautifully, making them perfect for advance preparation!
Quick Storage Guide:
- Room temperature: Up to 3 days in an airtight container
- Refrigerator: Up to 2 weeks (let sit 10-15 minutes before serving)
- Freezer: Up to 2 months in a freezer-safe container
Make-Ahead Options:
- Prepare the filing up to 2 days ahead and refrigerate
- Roll into balls the day before your event
- Dip in chocolate the morning of serving
- For gifts, make 1-2 weeks ahead and store in the refrigerator until packaging
Pro Tip: Place parchment paper between layers to prevent sticking. If freezing, flash-freeze balls on a baking sheet first before transferring to a storage container.
The texture of the Butterfinger pieces may soften slightly over time, but they’ll remain delicious! Having a batch ready in your freezer means you’re always prepared for unexpected guests or sudden sweet cravings.
The Secret to Perfect Butterfinger Balls
The key to creating truly exceptional Butterfinger Balls lies in the texture and temperature control. For that signature crunch that makes these treats irresistible, crush your Butterfinger candy bars to varying sizes – some fine powder and some small chunks. This creates a perfect textural contrast against the creamy peanut butter base.
Temperature management is equally crucial. Chilling the mixture before rolling helps prevent sticky hands, while the second refrigeration before chocolate dipping ensures the balls maintain their shape and don’t melt when they hit the warm chocolate. For the smoothest chocolate coating, keep your melted chocolate at around 88-90°F for milk chocolate or 90-92°F for dark chocolate.
Pro tip: If your chocolate begins to thicken during dipping, briefly reheat it for 10-second intervals, stirring between each. A touch of shortening or coconut oil (about 1 teaspoon per cup of chocolate) can also help achieve that perfect, glossy finish that makes Butterfinger Balls not just delicious, but beautiful too.
Expert Tips & Common Questions
Here are my top tips and answers to common questions about Butterfinger Balls:
Quick Pro Tips:
- Crush Butterfinger bars very finely for consistent texture
- Use room temperature butter and peanut butter for easier mixing
- Add a teaspoon of shortening to chocolate for smoother dipping
- Chill balls before dipping, but not until they’re freezing cold
- Work in small batches, keeping undipped balls in the refrigerator
FAQs:
Q: Why did my chocolate seize?
A: Avoid all water contact with chocolate. Use dry utensils and melt gently in 30-second microwave intervals.
Q: Too dry/crumbly mixture?
A: Add an extra tablespoon of peanut butter or teaspoon of milk until it holds together.
Q: Can I use chocolate chips?
A: Yes! Add 1 tablespoon shortening per cup of chips for proper dipping consistency.
Q: Why does my chocolate crack after setting?
A: Temperature shock. Let balls warm slightly before dipping and set at room temperature.
Q: How to make them look professional?
A: Place a small Butterfinger piece on top before chocolate sets or drizzle with contrasting chocolate.
Remember, practice makes perfect! Each batch will be better than the last as you master these simple techniques.

butterfinger balls recipe
Ingredients
- 6 Butterfinger candy bars fun size
- 1 cup graham cracker crumbs
- 1/2 cup butter softened
- 1 cup creamy peanut butter
- 1 cup powdered sugar
- 2 cups chocolate melting wafers milk or semi-sweet
- 1 tablespoon shortening or coconut oil optional, for smoother chocolate
Instructions
- Unwrap and crush Butterfinger candy bars into fine pieces.
- Mix crushed Butterfingers, graham cracker crumbs, softened butter, peanut butter, and powdered sugar until well combined.
- Refrigerate mixture for 20 minutes to firm up slightly.
- Roll mixture into 1-inch balls and place on a parchment-lined baking sheet.
- Chill balls for 30 minutes in the refrigerator.
- Melt chocolate wafers with shortening (if using) in the microwave in 30-second intervals.
- Dip each chilled ball into melted chocolate, ensuring complete coverage.
- Place dipped balls back on parchment paper to set.
- Refrigerate until chocolate is fully hardened, about 20 minutes.
- Store in an airtight container in the refrigerator for up to 2 weeks.
Notes
- Calories: 217 per ball
- Fat: 13g
- Saturated Fat: 6g
- Carbohydrates: 23g
- Sugar: 19g
- Protein: 4g
- Fiber: 1g
- Sodium: 99mg
- Cholesterol: 8mg

